


How to Remove Calcium from Pool Tile (The Complete Guide)

Calcium buildup on pool tile is one of the most common headaches for pool owners — those chalky, rough, white or tan deposits that appear along the waterline or on steps. Knowing how to remove calcium from pool tile safely and effectively preserves the beauty of your tile, prevents surface etching, and keeps your pool looking its best. This complete guide walks you through causes, safe removal methods (DIY and professional), recommended products and tools, prevention tips, and a deep dive on a proven product used to remove calcium, lime, and spots.
Use this guide to plan your cleaning approach, choose the right chemicals and tools, and avoid common mistakes that damage grout and tile.
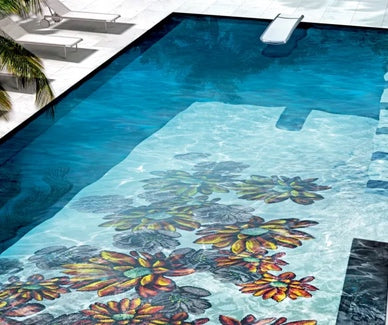
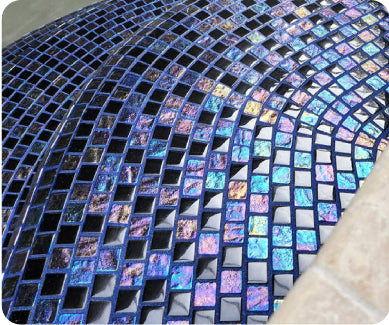
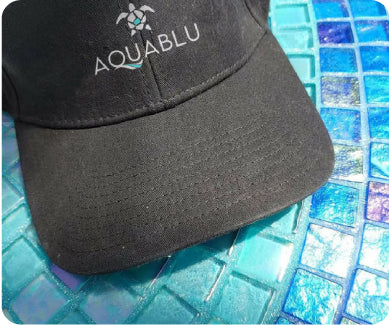
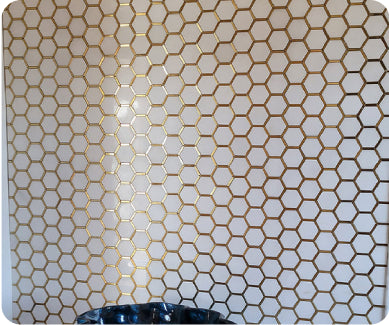
Calcium, Lime & Spot Remover

A reliable commercial product specifically formulated for mineral removal can be a game-changer when figuring out how to remove calcium from pool tile. AquaBlu’s Calcium, Lime, & Spot Remover (the product page lists it under Pool Tile Cleaning Solutions) is designed to dissolve stubborn calcium and lime deposits and lift spots without unnecessary surface damage when used as directed. This section covers benefits, primary use cases, and practical application tips so you can assess whether this product fits your maintenance routine.
Benefits
- Targeted mineral removal: This type of remover is formulated to break down calcium carbonate and related mineral deposits more effectively than household cleaners. That means less aggressive scrubbing and lower risk to grout and tile surfaces when used per instructions.
- Ease of use: Many calcium removers are supplied as ready-to-use bottles or concentrates that dilute easily. A clear application process (apply, dwell, scrub, rinse) simplifies the job for DIYers and pros alike.
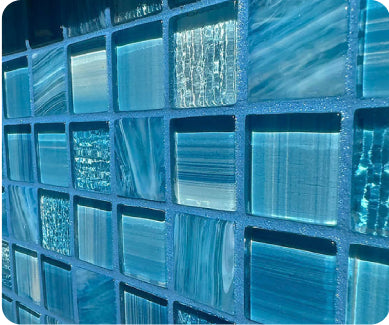
- Compatibility with pool tile: When marketed by pool tile specialists, these removers are often tested against glass mosaic tile, porcelain, and glazed ceramics, offering confidence that they won’t etch common pool tile surfaces when used correctly.
- Time savings: Compared with long manual scrubbing or repeated vinegar treatments, a proper calcium remover significantly shortens the time needed to restore a tile’s finish.
- Professional-grade chemistry: Such solutions usually contain chelators and other ingredients that access and dissolve mineral layers, even where scale is baked on by sun and evaporation.
Use Cases
- Waterline deposits: The most frequent use case for calcium removers is the waterline, where evaporation concentrates minerals. Apply the product around the waterline band to remove the telltale white ring that forms after summer.
- Steps and benches: Areas where water circulation is lower often develop calcium. The remover helps lift deposits from step risers and bench faces without heavy abrasion.
- Grout spot cleanup: Small, spotty mineral deposits in grout joints can be dissolved, restoring grout color and uniformity — though follow-up grout sealing is recommended.
- Pre-sale/detail cleaning: Contractors and pool pros use commercial calcium removers when preparing a pool for handover or resale to ensure tile looks like-new.
- Periodic deep cleans: Even if you maintain balanced chemistry, an annual or semi-annual descaling with a targeted remover helps keep tiles pristine.
Practical Application Tips
- Read the label: Confirm suitability for your tile type (glass, porcelain, ceramic). Some natural stones are incompatible.
- Spot test: Apply product to a small, inconspicuous area to verify no adverse reactions.
- Follow dwell time: The product needs time to loosen mineral bonds; do not scrub immediately unless product instructions call for it.
- Use appropriate scrubbing pads: After dwell time, use a non-abrasive pad or soft brush to lift deposits. Avoid metal tools or harsh scouring.
- Rinse thoroughly: Complete rinsing prevents any chemical residues that could affect pool chemistry or harm plantings.
- Neutralize and balance pool water: If product contacts pool water, check and rebalance pH, alkalinity, and sanitizer levels according to pool care best practices.
A product like AquaBlu’s Calcium, Lime, & Spot Remover is a practical, time-saving solution for homeowners and professionals alike who want a reliable method for how to remove calcium from pool tile. For technical data, always review the manufacturer’s instructions on the product page before use and consult a professional when in doubt.
What Causes Calcium Buildup on Pool Tile?
Calcium deposits form when hard water minerals (calcium carbonate) precipitate out of pool water and adhere to surfaces. Several conditions accelerate this:
- High calcium hardness or high total dissolved solids in the pool water.
- High pH and alkalinity (encourages scale formation).
- Evaporation at the waterline — minerals concentrate as water evaporates.
- Infrequent cleaning and inconsistent water chemistry control.
Understanding the cause is the first step in learning how to remove calcium from pool tile and preventing it from recurring.
Safety First: Before You Start
When removing calcium, always wear chemical-resistant gloves, eye protection, and a mask if you use acidic products. Work in a well-ventilated area and avoid splashing cleaners on landscaping or metal fixtures. If you’re cleaning submerged tile, follow manufacturer guidance for pool shutdown or area isolation.
Now — how to remove calcium from pool tile? Below are step-by-step approaches from gentle to aggressive, depending on how stubborn the scale is.
Gentle Methods: The First Line of Defense
- Brush and rinse: Use a soft-bristle brush and warm water to scrub light deposits — sometimes this is enough for fresh, thin scale.
- Vinegar soak (spot test first): For small, delicate areas on non-porous tile, dilute white vinegar 1:1 with water and apply for short periods, then rinse. Avoid vinegar on sensitive natural stone or some specialty glass tiles.
- Baking soda paste: Make a paste with baking soda and water, apply to spots and scrub gently with a non-scratch pad — rinse thoroughly.
These gentle techniques are appropriate when learning how to remove calcium from pool tile and are safe for regular upkeep. If scale persists, move to targeted chemical cleaners made for pool tile.
Chemical Treatments: Professional-Grade Solutions
For moderate to heavy calcium buildup, you’ll likely need a specialty cleaner formulated to dissolve mineral deposits. Use products designed for pool tile and follow label instructions carefully. Typical steps:
- Pre-wet the tile to reduce chemical concentration shock.
- Apply cleaner directly to the calcium deposit (using a brush or applicator).
- Allow dwell time as per product instructions so the cleaner breaks down the mineral.
- Scrub gently with a non-metallic brush or pad.
- Rinse thoroughly with clean water.
- Repeat if needed.
This method is the standard answer to the question of how to remove calcium from pool tile for many pool installers and service pros.
How to Remove Calcium from Pool Tile: When to Use Acid
Strong acids (muriatic acid or stronger descalers) will remove heavy, stubborn scale but carry risk: they can etch tile, damage grout, and affect pool water chemistry. If you consider acid, use diluted solutions, specialized tile descalers, protective gear, and ideally a professional. Many modern, safer calcium removers provide acid-free or buffered formulations that reduce risk while being effective — making them a preferred option when learning how to remove calcium from pool tile safely.
Tools You’ll Need
- Soft- or medium-bristle pool tile brush (non-metallic)
- Mesh-backed sponge (for mosaics)
- White non-scratch scrub pad
- Plastic scraper or putty knife (for thick crusts; be careful)
- Spray bottle and garden hose for rinsing
- Chemical-resistant gloves, goggles, and apron
Using the right tools keeps the process efficient and limits damage while removing calcium from pool tile.
Preventing Calcium Build-Up: Long-Term Steps
Knowing how to remove calcium from pool tile is vital, but prevention is even better. Follow these steps to reduce recurrence:
- Balance water chemistry: Maintain recommended levels for pH (7.2–7.6), total alkalinity, and calcium hardness.
- Use a sequestrant if necessary: In areas with very hard fill water, a sequestrant helps keep minerals in solution and prevents precipitation.
- Regular brushing: Weekly brushing of the waterline prevents buildup.
- Lower evaporation at the edge: Install windbreaks or check evaporation-prone behaviors to lessen mineral concentration at the waterline.
- Periodic professional servicing: Annual servicing checks TDS and hardness and recommends corrective actions.
These measures cut down how often you need to remove calcium from pool tile and lengthen the time between deep cleans.
When to Call a Professional
If scale is very thick, if tile is natural stone, or if you’re uncomfortable using chemical products, hire a pool service or tile restoration pro. Pros have access to industrial descalers, low-impact mechanical cleaning systems, and precise monitoring to restore tile safely.
FAQ
How often should I check for calcium buildup?
Inspect the waterline and steps monthly and brush weekly; treat deposits as soon as you see them to avoid heavy scaling.
Can I use muriatic acid to remove calcium?
Muriatic acid works but is risky—can etch tile and harm grout and surrounding surfaces. Use only if you know what you’re doing or leave it to a professional.
Will calcium remover damage glass mosaics?
Reputable pool-tile cleaners designed for calcium removal are formulated to be safe on glass and porcelain when used per label. Always spot-test first.
After removing calcium, do I need to seal tile or grout?
For grout, sealing afterward helps repel future deposits. Most glazed tiles don’t require sealing, but always follow manufacturer recommendations.
What’s the quickest way to remove calcium from pool tile?
A targeted commercial calcium remover, correct dwell time, gentle scrubbing, and thorough rinsing is the fastest and safest method for typical waterline scale.